大体思路:
1、首先你得有个OSS
2、使用阿里云Oss Java SDK,调整ruoyi框架代码
1、前提引入:
Ruoyi默认上传文件的地址为本地服务器,而我想把文件传到云存储上,起初想着直接用ECS服务器,结果找了半天发现并不好使,于是听劝,正好有试用,弄了个OSS……
2、Ruoyi框架上传文件到OSS–解析:
(1)定位上传文件接口:
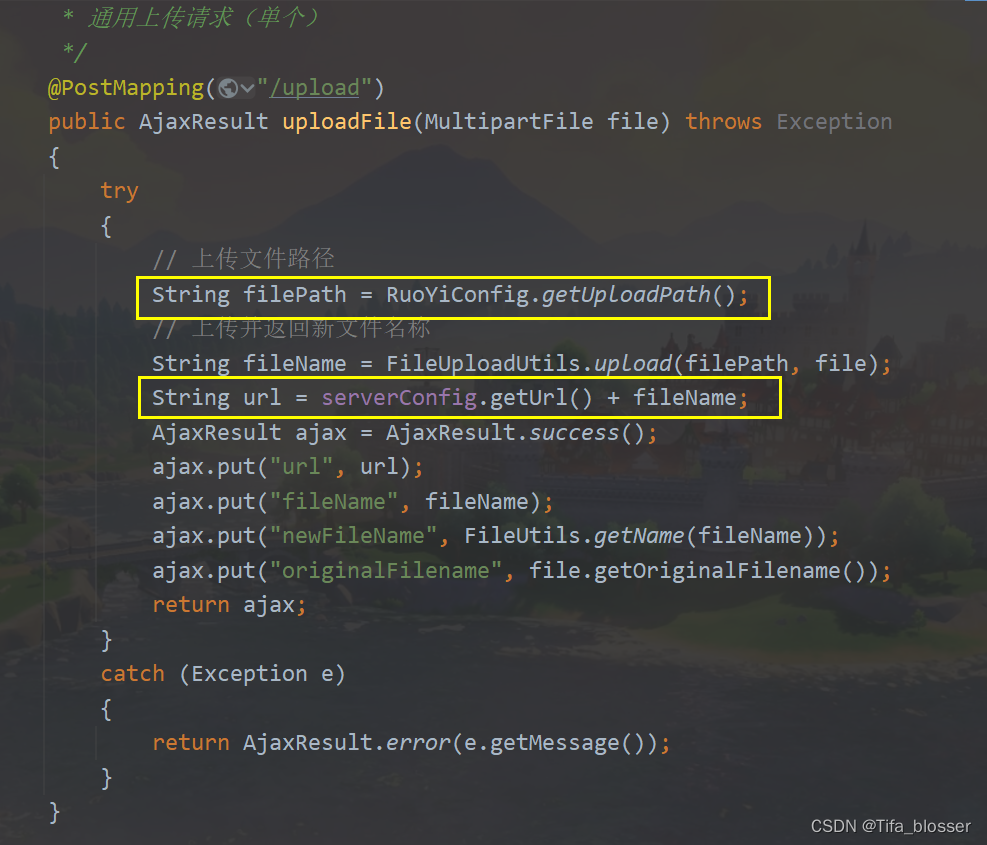
在admin模块定位到Ruoyi上传文件的接口文件:CommonController,如下:
1
| com.ruoyi.web.controller.common.CommonController
|

找到uploadFile()方法,发现其是依据你当前的代码运行环境,进行的文件上传。
(比如前缀:http://localhost/dev-api,再加文件名字)


我们需要更改对前缀的获取方法,引用OSS java sdk
(2)common模块,引入OSS、lombok依赖
在common模块(就是ruoyi-common文件夹)找到pom.xml文件:引入OSS、lombok依赖
1
2
3
4
5
6
7
8
9
10
11
12
13
|
<dependency>
<groupId>com.aliyun.oss</groupId>
<artifactId>aliyun-sdk-oss</artifactId>
<version>3.11.2</version>
</dependency>
<dependency>
<groupId>org.projectlombok</groupId>
<artifactId>lombok</artifactId>
<version>1.18.26</version>
</dependency>
|

(防止报错,推荐也在admin模块的pom文件,引入依赖)
(3)调用Oss服务
在common模块下,找到file文件(路径:com.ruoyi.common.utils.file),新建OssUtil类。
1
2
3
4
5
6
7
8
9
10
11
12
13
14
15
16
17
18
19
20
21
22
23
24
25
26
27
28
29
30
31
32
33
34
35
36
37
38
39
40
41
42
43
44
45
46
47
48
49
50
51
52
53
54
55
56
57
58
59
60
61
62
63
64
65
66
67
68
69
70
71
72
73
74
75
76
77
78
79
80
81
82
83
84
85
86
87
88
89
90
91
92
93
94
95
96
97
98
99
100
101
102
103
104
105
106
107
108
109
110
111
112
113
114
115
116
117
118
119
120
121
122
123
124
125
126
127
128
129
130
131
132
133
134
135
136
137
138
139
140
141
142
143
144
145
146
147
148
149
150
151
152
153
154
155
156
157
158
159
160
| package com.ruoyi.common.utils.file;
import com.aliyun.oss.OSS;
import com.aliyun.oss.OSSClientBuilder;
import com.aliyun.oss.model.GetObjectRequest;
import com.aliyun.oss.model.PutObjectRequest;
import lombok.extern.log4j.Log4j2;
import org.springframework.web.multipart.MultipartFile;
import java.io.*;
import java.time.LocalDateTime;
import java.util.UUID;
@Log4j2
public class OssUtil {
private static String endPoint = "oss-cn-beijing.aliyuncs.com";
private static String accessKeyId = "这是你的RAM用户的id";
private static String accessKeySecret = "这是你的RAM用户的Secret";
private static String accessPre = "https://xxxxxxx.oss-cn-beijing.aliyuncs.com/";
private static String bucketName = "xxxxxxx";
private static OSS ossClient ;
static {
ossClient = new OSSClientBuilder().build(
endPoint,
accessKeyId,
accessKeySecret);
log.info("oss服务连接成功!");
}
public static String uploadFile(String filePath){
return uploadFileForBucket(bucketName,getOssFilePath(filePath) ,filePath);
}
public static String uploadMultipartFile(MultipartFile multipartFile) {
return uploadMultipartFile(bucketName,getOssFilePath(multipartFile.getOriginalFilename()),multipartFile);
}
public static String uploadMultipartFile(String bucketName , String ossPath , MultipartFile multipartFile){
InputStream inputStream = null;
try {
inputStream = multipartFile.getInputStream();
} catch (IOException e) {
e.printStackTrace();
}
uploadFileInputStreamForBucket(bucketName, ossPath, inputStream);
return accessPre+ossPath;
}
public static String uploadFileForBucket(String bucketName , String ossPath , String filePath) {
PutObjectRequest putObjectRequest = new PutObjectRequest(bucketName, ossPath, new File(filePath));
ossClient.putObject(putObjectRequest);
return accessPre+ossPath;
}
public static String uploadFileInputStreamForBucket(String bucketName , String ossPath , String filePath){
InputStream inputStream = null;
try {
inputStream = new FileInputStream(filePath);
} catch (FileNotFoundException e) {
e.printStackTrace();
}
uploadFileInputStreamForBucket(bucketName, ossPath, inputStream);
return accessPre+ossPath;
}
public static void uploadFileInputStreamForBucket(String bucketName , String ossPath , InputStream inputStream ){
ossClient.putObject(bucketName, ossPath, inputStream);
}
public static void downloadFile(String ossFilePath , String filePath ){
downloadFileForBucket(bucketName , ossFilePath , filePath);
}
public static void downloadFileForBucket(String bucketName , String ossFilePath , String filePath ){
ossClient.getObject(new GetObjectRequest(bucketName, ossFilePath), new File(filePath));
}
public static String getOssDefaultPath(){
LocalDateTime now = LocalDateTime.now();
String url =
now.getYear()+"/"+
now.getMonth()+"/"+
now.getDayOfMonth()+"/"+
now.getHour()+"/"+
now.getMinute()+"/";
return url;
}
public static String getOssFilePath(String filePath){
String fileSuf = filePath.substring(filePath.indexOf(".") + 1);
return getOssDefaultPath() + UUID.randomUUID().toString() + "." + fileSuf;
}
}
|

1
| 注意去官网(OSS访问域名和数据中心_对象存储(OSS)-阿里云帮助中心)看下自己的endPoint;我的为华北2(北京),如下:
|
(4)调整CommonController:
1
2
3
4
5
6
7
8
9
10
11
12
13
14
15
16
17
18
19
20
21
22
23
24
25
26
27
28
29
30
31
32
| 更改uploadFile方法中文件路径的获取方式:如下(可直接复制)
/**
* 通用上传请求(单个)
*/
@PostMapping("/upload")
public AjaxResult uploadFile(MultipartFile file) throws Exception
{
try
{
// 上传文件路径
// String filePath = RuoYiConfig.getUploadPath();
//新添加的用法
String fileName = OssUtil.uploadMultipartFile(file);
System.out.println(fileName);
// 上传并返回新文件名称
// String fileName = FileUploadUtils.upload(filePath, file);
// String url = serverConfig.getUrl() + fileName;
String url = fileName;
AjaxResult ajax = AjaxResult.success();
ajax.put("url", url);
ajax.put("fileName", fileName);
ajax.put("newFileName", FileUtils.getName(fileName));
ajax.put("originalFilename", file.getOriginalFilename());
return ajax;
}
catch (Exception e)
{
return AjaxResult.error(e.getMessage());
}
}
|

到这一步,一般就完成了,接下来可以验证一下
3、验证
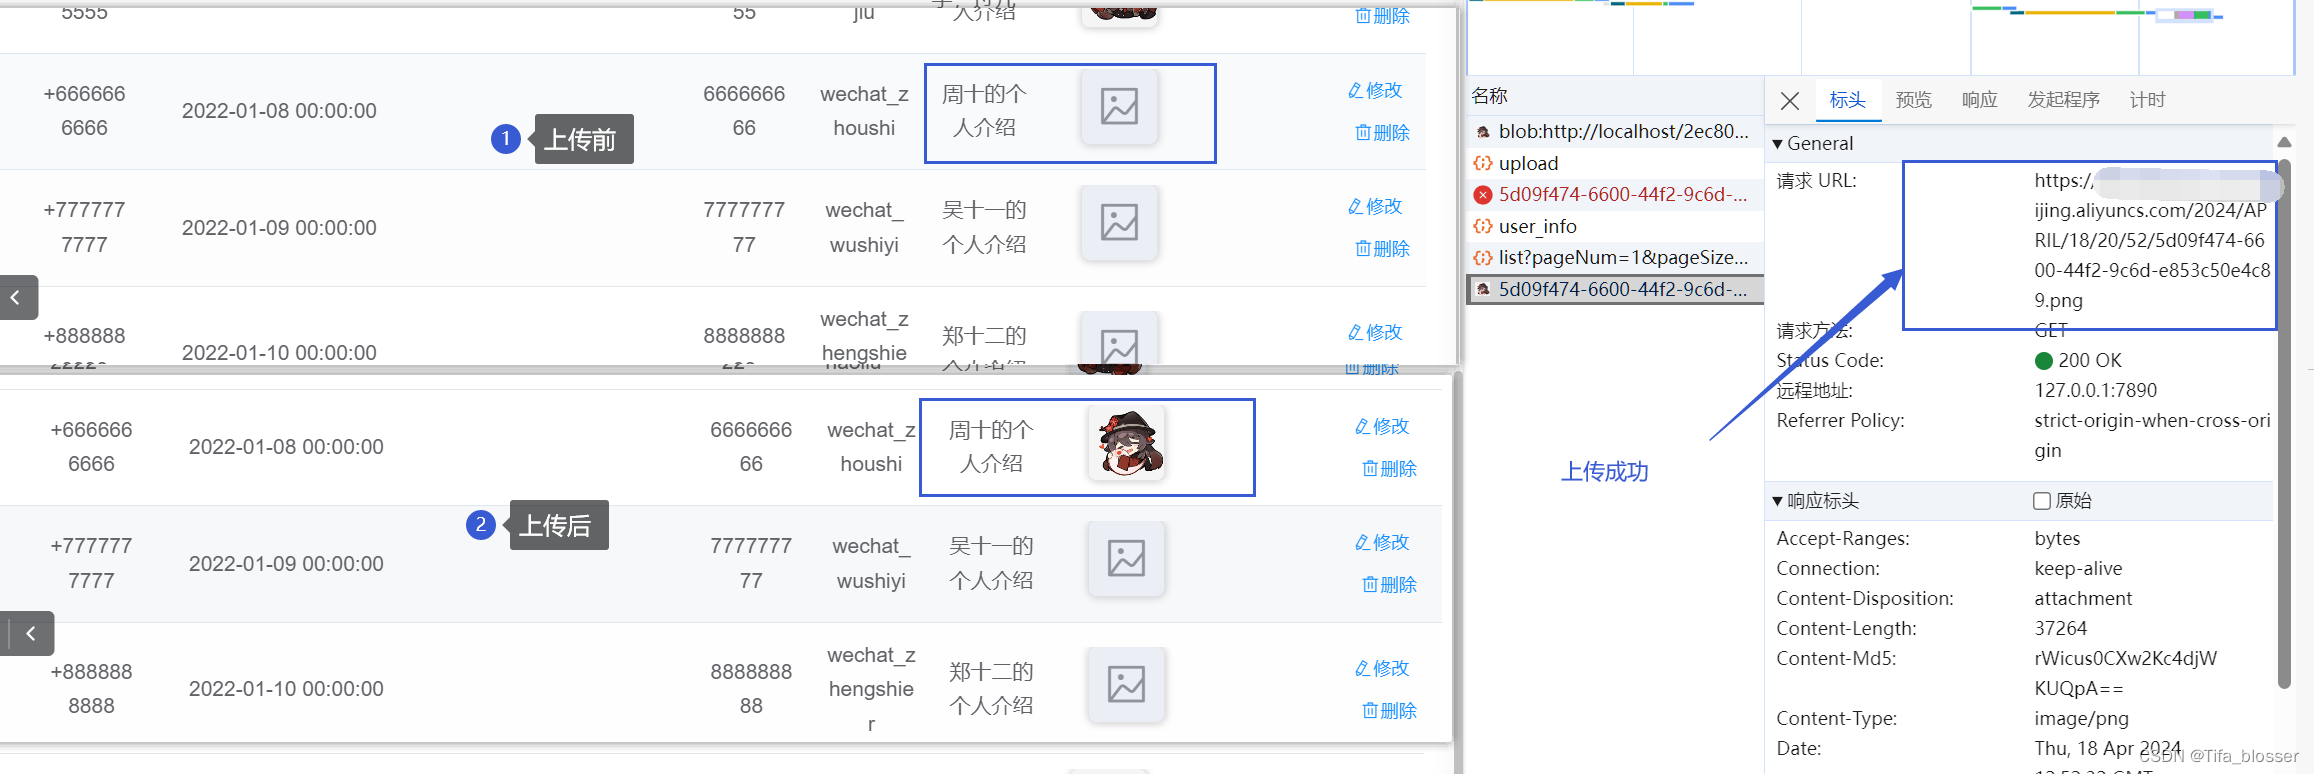
重启后端,进行图片上传操作(文件也类似,调用的接口一致,就用图片来验证了):


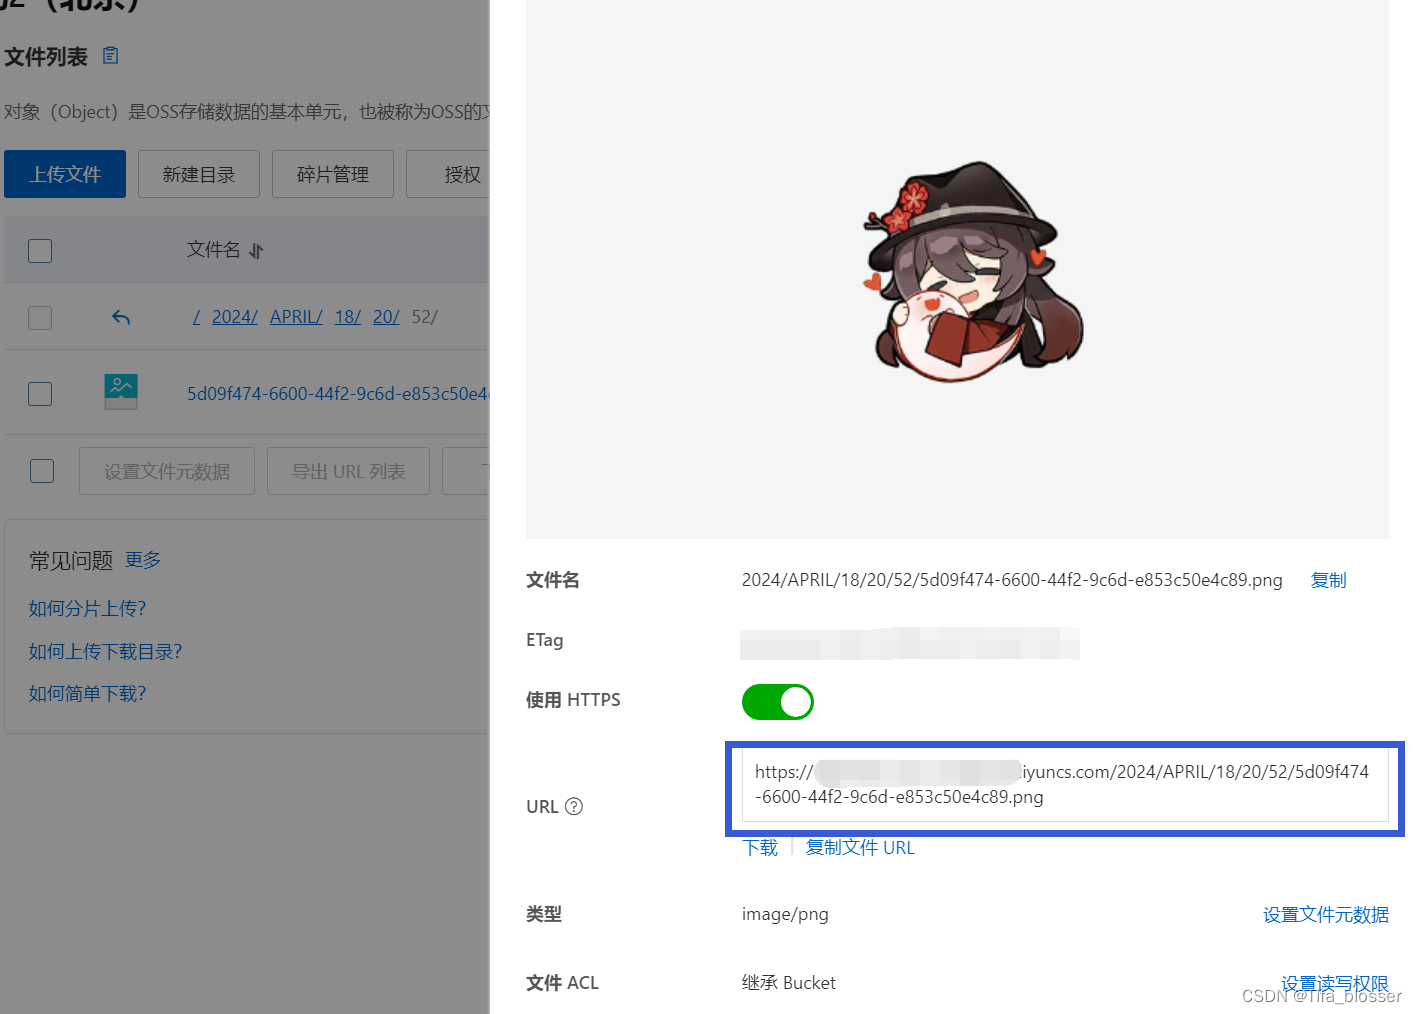
OSS内验证:


成功存储~
4、前端运用:
简述:在写完若依后端的上传文件到服务器的接口后,需要在移动端(uniapp)上同步操作。使用uni-file-picker组件完成。
上图:

 编辑
编辑
 编辑
编辑
(1)引用组件:
组件地址:uni-file-picker 文件选择上传 - DCloud 插件市场
引用组件后,配置好对应的属性,
1
2
3
4
5
6
7
| <uni-file-picker style="height: 150rpx;"
v-model="actData.actSurfacePlot" title="选择您的活动封面" limit="3"
file-mediatype="image" @select="upload" :auto-upload="false">
</uni-file-picker>
|

(2)补充JS函数:
1
2
3
4
5
6
7
8
9
10
11
12
13
14
15
16
17
18
19
20
| upload(e) {
const tempFilePaths = e.tempFilePaths;
uni.uploadFile({
url: 'http://localhost:80/dev-api/common/upload',
filePath: tempFilePaths[0],
name: 'file',
formData: {
'user': 'test'
},
success: (uploadFileRes) => {
const imgUrls = JSON.parse(uploadFileRes.data).url;
this.selectedImg = this.selectedImg + imgUrls+',' ;
console.log(this.selectedImg);
}
});
}
|


编辑

编辑


